By
By 
Turning Students into Astronomers
At the beginning of every month, the website Space.com publishes a calendar of celestial highlights for that month. It’s produced by the astronomers who created Starry Night. The calendar indicates when the four main phases of the moon occur, when planets meet up or pass close to one another or to bright stars, when meteor showers peak in intensity, and much more. Each event features an easy-to-understand description and a picture that illustrates what you’ll see. The most recent calendar is here. These events can be used to plan an educational stargazing session.
Teachers and students can open the calendar of events, and then use Starry Night to reproduce how that event will look from their own home location. First, set the program to the date and time of day for an event. If you don’t see the moon, star, planet, or constellation of interest, use the built-in search feature to find it. Note how high in the sky the object is, and what direction you’ll need to look. Then head outside and estimate where in the sky the event will happen. You can do this well in advance of the event – and it can even be done during the daytime! Will the object be high enough in the sky to be clear of the trees, buildings, or hills? Where will you need to stand to see it? Or where will you want to set up a telescope?
 Students will soon learn that the moon is only visible in evenings during certain weeks of the lunar month. If the moon isn’t above the horizon when a particular phase occurs, adjust the time to see when it will rise at your location. They’ll see that once the moon passes last quarter, it only rises between midnight and dawn – so they’ll need to look for it during the morning, instead of at night.
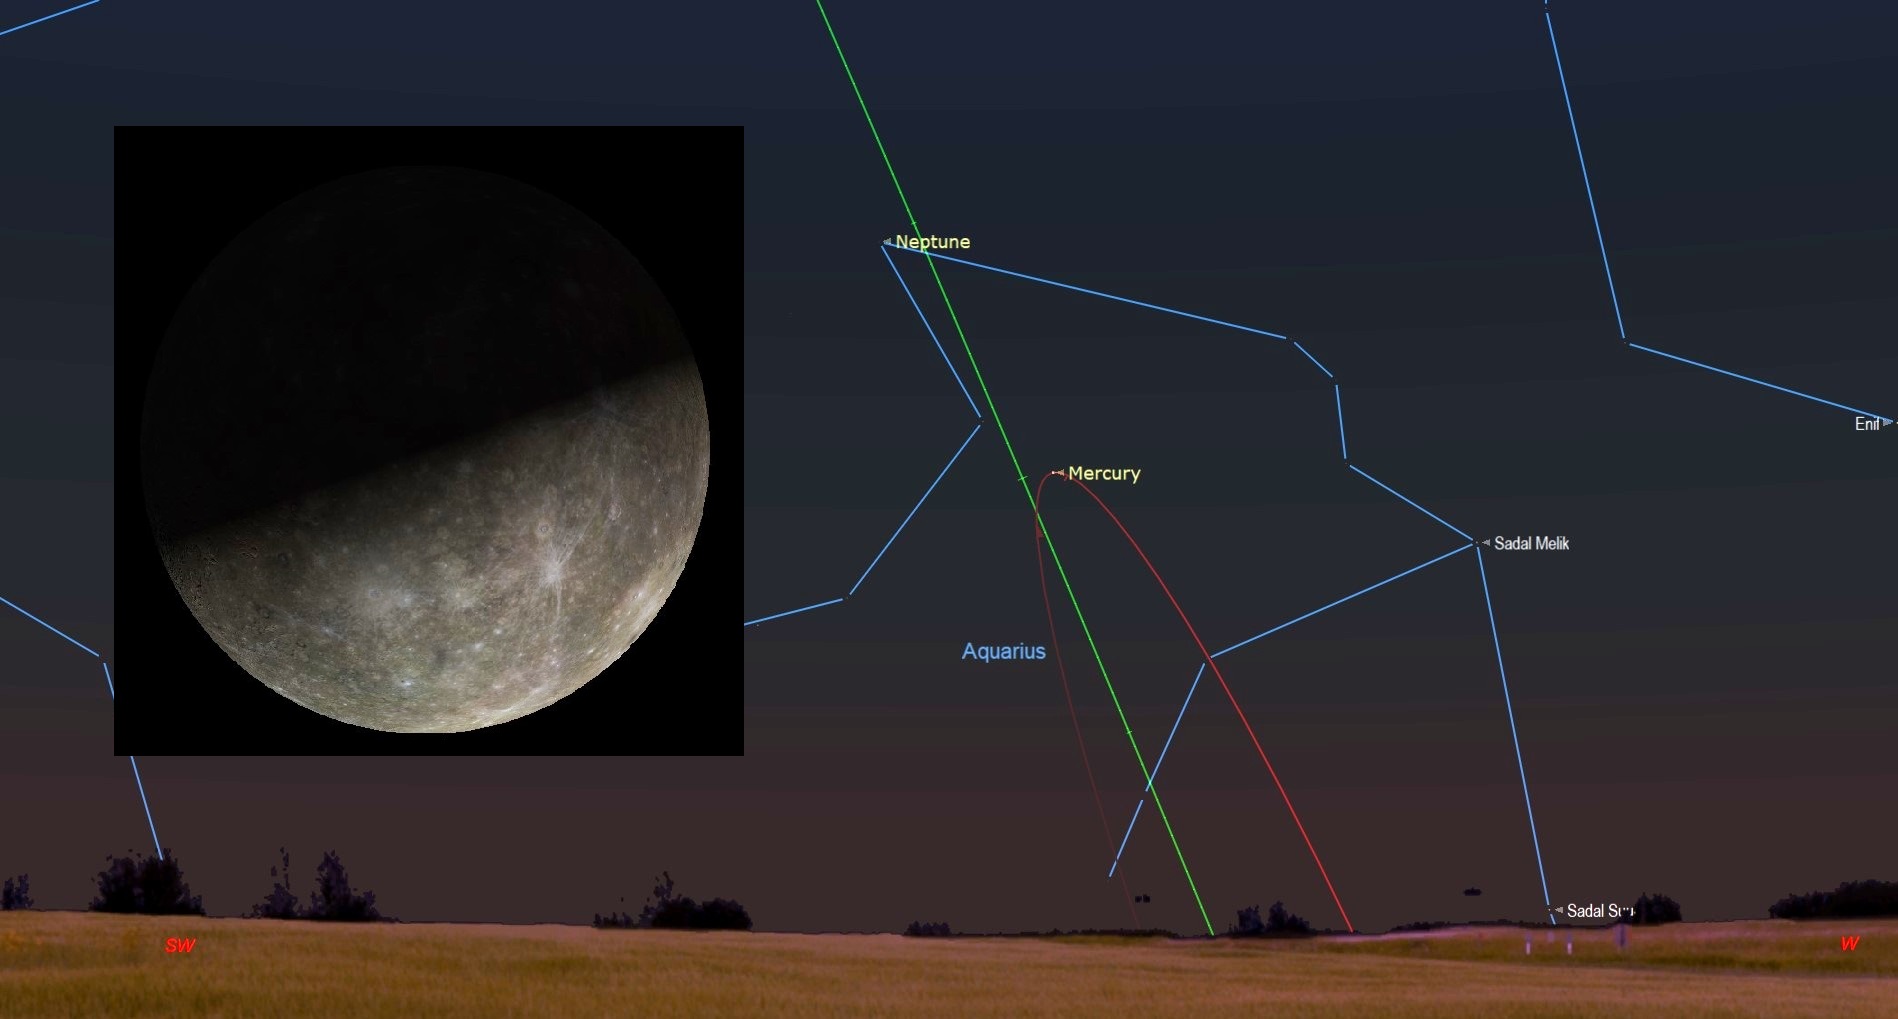
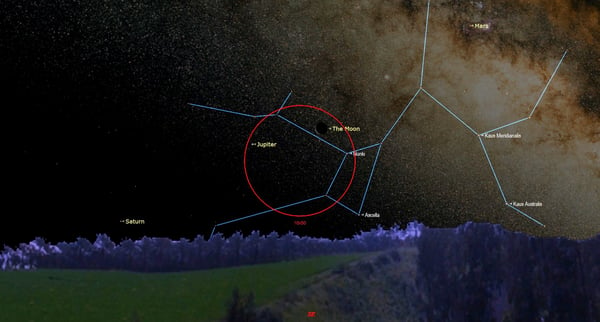
Two events worth seeing during the coming weeks include the old crescent moon sitting near the bright planet Jupiter on the morning of February 19, observing the young crescent moon near Venus in the western evening sky on February 27, and the Full Worm Supermoon after sunset on March 9.
Planning and Reviewing a Stargazing Session
While special celestial events usually occur only on certain dates, you don’t need to plan your students’ stargazing around them - because there’s always something to see on a clear evening. It’s not necessary to own a telescope, either. Many objects are easy to see using unaided eyes and binoculars. Use Starry Night to make sky charts labelled with the items you intend to view. And later, you can use the program to replicate the sky you saw and have the students point out the planets, stars, and constellations they remember seeing.
Have a look at the weather forecast for the coming nights and use Starry Night to create a sky chart for a future clear night. You can use the program’s File/Print command to make a full-sky chart, but I prefer to use the File/Export Sky View menu option to save a screen shot of the part of the sky I want to observe, and print that. The cntrl-shift-w command will switch the sky from white objects on a black sky to the inverse - a bit easier to read when outside. (Bring a red flashlight, or put some red film over a white one, so you can read your sky map under the stars.)
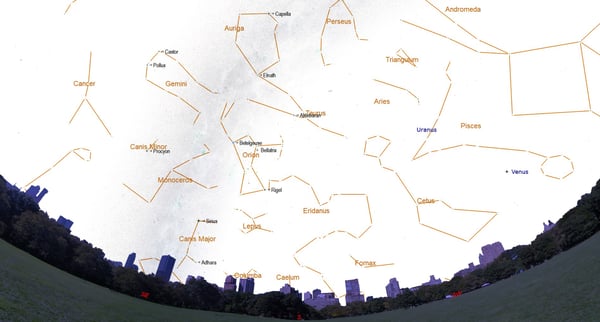
Here are a few easy-to-see objects during evening in February and March, 2020. Spot the very bright planet Venus gleaming in the western evening sky for a few hours after sunset. Note that it doesn’t twinkle as bright stars do. Speaking of twinkle, spot the brightest star in the entire night sky – Sirius, also known as Alpha Canis Majoris and the “Dog Star”. Sirius sits low over the southeastern horizon during evening. It’s so bright because it is located only 9 light-years away from our solar system. It’s famous for flashes of color as it twinkles. Look above Sirius for the prominent constellation of Orion, the Hunter – with his three-starred belt. Aim your binoculars at Orion’s dangling sword to see the grey fuzzy patch of the Orion Nebula, also known as Messier 42.
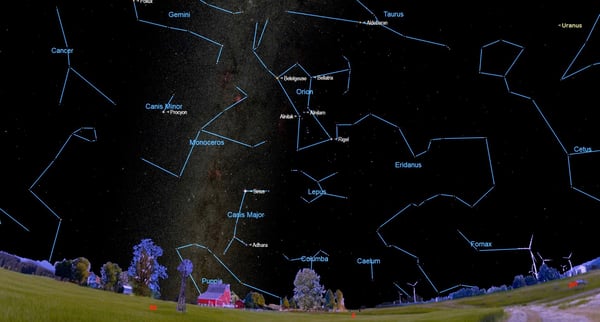
Well to the upper right of Orion, beyond Taurus the Bull’s brightest star, orange-tinted Aldebaran, sits the bright little star cluster known as the Pleiades. This cluster is easy to see with unaided eyes, and is spectacular in binoculars. Many indigenous cultures around the world consider the Pleiades to be a portal to the afterlife.
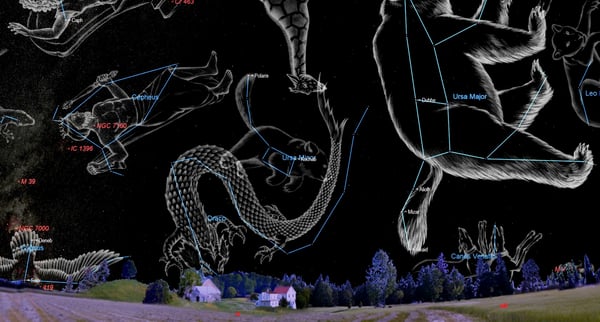
Finally, swing around and face north. Here you’ll find the Big Dipper standing upright on its handle. The two stars forming the outer rim of the dipper’s bowl can be used to form a line to the left – directly towards Polaris, the North Star. Ask your students to estimate how many degrees Polaris is above the northern horizon. The correct answer equals your latitude on Earth. To the upper left of Polaris look for the distinctive M- or W-shaped constellation of Cassiopeia, the Queen. The lower, pointier “V” of Cassiopeia points directly at the distant Andromeda Galaxy. That distant galaxy, which is located 2.5 million light-years away from us, can be seen in binoculars and even with unaided eyes from dark sky locations.
Here are a few more exercises in observational astronomy that you can assign your students. Ask them to create a sunset diary. Note at what time it seems to get dark, and review how that time varies over days and weeks. How does that information relate to the current season? Ask the students to make a Moon Phases log. What phase was the moon in and at what time and date did they see it? Can they estimate what percentage of the moon is lit up? Are there blocks of time when they couldn’t find the moon? Compare the results month after month and estimate how many days it takes for the moon to repeat a particular phase. Ask them to head out as the sky is starting to get dark and see which star or bright planet they spot first. Note where in the sky it is, and the time, and then later use Starry Night to identify what it was. You’ll soon have a junior astronomer on your hands! Keep looking up!
 Chris Vaughan is a planetarium presenter and an astronomy public outreach and education specialist at AstroGeo, a member of the Royal Astronomical Society of Canada, and an operator of the historic 74-inch (1.88-meter) David Dunlap Observatory telescope. You can reach him via email, and follow him on Twitter @astrogeoguy, as well as on Facebook and Tumblr.
Follow SkySafari on Twitter @SkySafariAstro. Follow us Space.com on Twitter @Spacedotcom onTwitter and on Facebook.
Get Starry Night Astronomy and/or Layered Earth Geology, Meteorology, or Physical Geography at the Homeschool Buyers Club for only $39.95 per course.